Model Rocket Introduction
Model rockets are small solid rocket fuel propelled rockets that can be built at home or in school. These model rockets have multiple stages of flight, including launch, rapid ascent, short glide, ejection, slow descent, and recovery. A model rocket has a body (the main tube), a launch lug to stabilize the launch, fins to stabilize flight, an engine mount to hold the engine in place, a nose cone for reduced drag, and a parachute or other high drag system to slow the rocket down for a safe descent and recovery.
Design Process
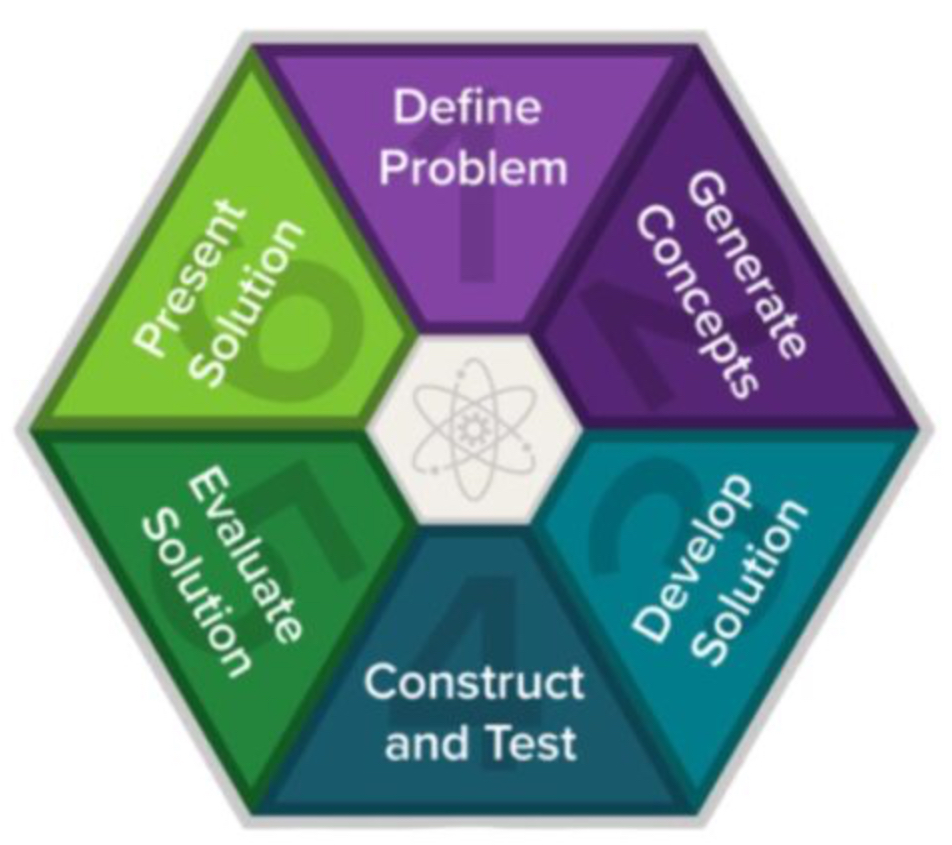
The design process I used for the rocket included:
1. Defining a problem: The rocket needed to attain a high apogee, or maximum height. Also, there were multiple constraints which included only having classroom materials available for construction. This meant that carbon fiber could not be used, which would be lighter and stronger than cardboard or balsa wood.
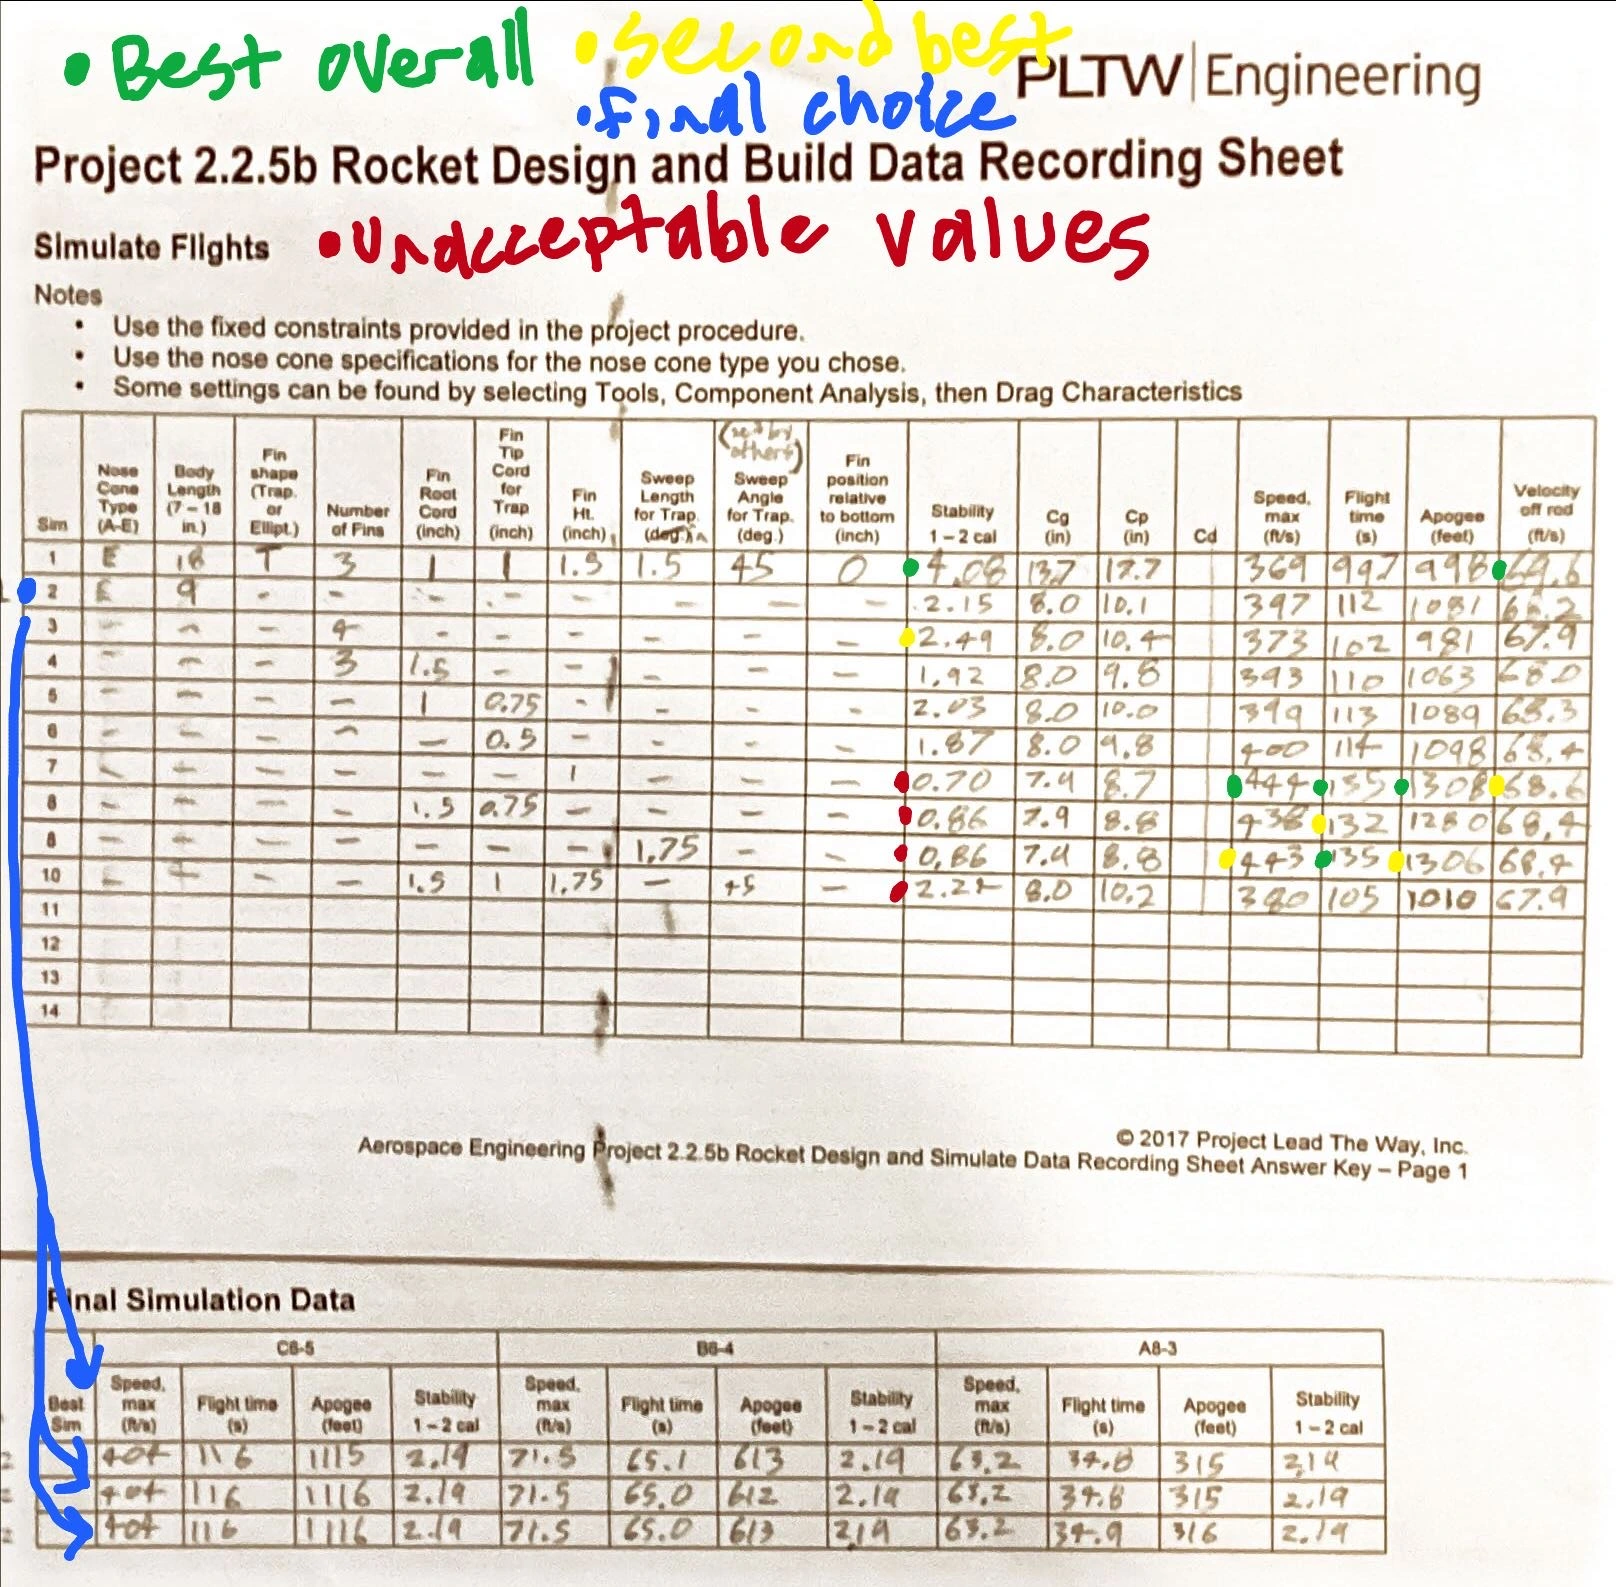
2. Generating concepts: In this step of the design process, I created and changed multiple aspects of the rocket design using the OpenRocket design software. Variables I changed included body length, fin height, fin root chord, and fin tip chord.
3. Develop a solution: My final solution was very similar to the original design, having only changed the body length to 9 inches. This was the design with the best balance between stability and apogee.
4. Construct and test: To construct the rocket, I started with constructing the engine mount. This used a cardboard tube with superglued centering rings around it. There was also an engine hook to keep the engine in place. Next, I cut the body to a length of 9 inches. After that, I glued the engine mount into the fuselage using tacky hobby glue to ensure it could slide in. Then, I cut the fins using a lasercutter and superglued them to the fuselage. To find the correct location for the fins, I used a 90 degree marking guide and a fin marking guide with three equidistant marks. Lastly, I glued on the launch lug.
5. Evaluate solution: To test the stability, I used lassoing. This involves connecting a string to the center of gravity of the rocket, and then swinging the rocket above my head in a circle. The rocket flew steadily, which shows that it is stable and should be safe to fly.
6. Present the solution: To share this project, I added it to this portfolio.
Simulation and Design using OpenRocket
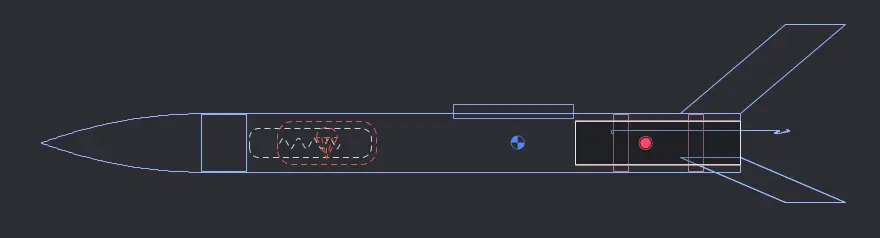
To design my model rocket, I used the free software OpenRocket.
I changed the fuselage length from 18 inches to 9 inches.
This reduced the surface area, which reduced drag and increased the apogee.
This was the only change I made for the final design,
as further changes increased the apogee but decreased the stability to unpredictable levels.
I also wanted the fins to be small enough to stay attached easily and not break during a hard landing, but also large enough to maintain a stable ascent.
After this change, I also made a few other changes which resulted in a higher apogee but much lower stability.
These changes included:
* Decreasing the fin tip chord from 1 inch to 0.75 inches.
* Changing the fin root chord from 1 inch to 1.5 inches.
* Reducing the fin height from 1.5 inches to 1 inch.
Benefits of the final design include:
* A high stability of 2.15 cal due to the larger fins. The fin design is also not too large as some fins can detach during landing if the size passes a certain extent.
* The apogee is estimated to be 1081 feet, which will likely occur due to the stability of this design.
* An exceptionally long simulated flight time of 112 seconds, which is a result of the parachute deployment slowing the rocket's descent to a safe landing velocity.
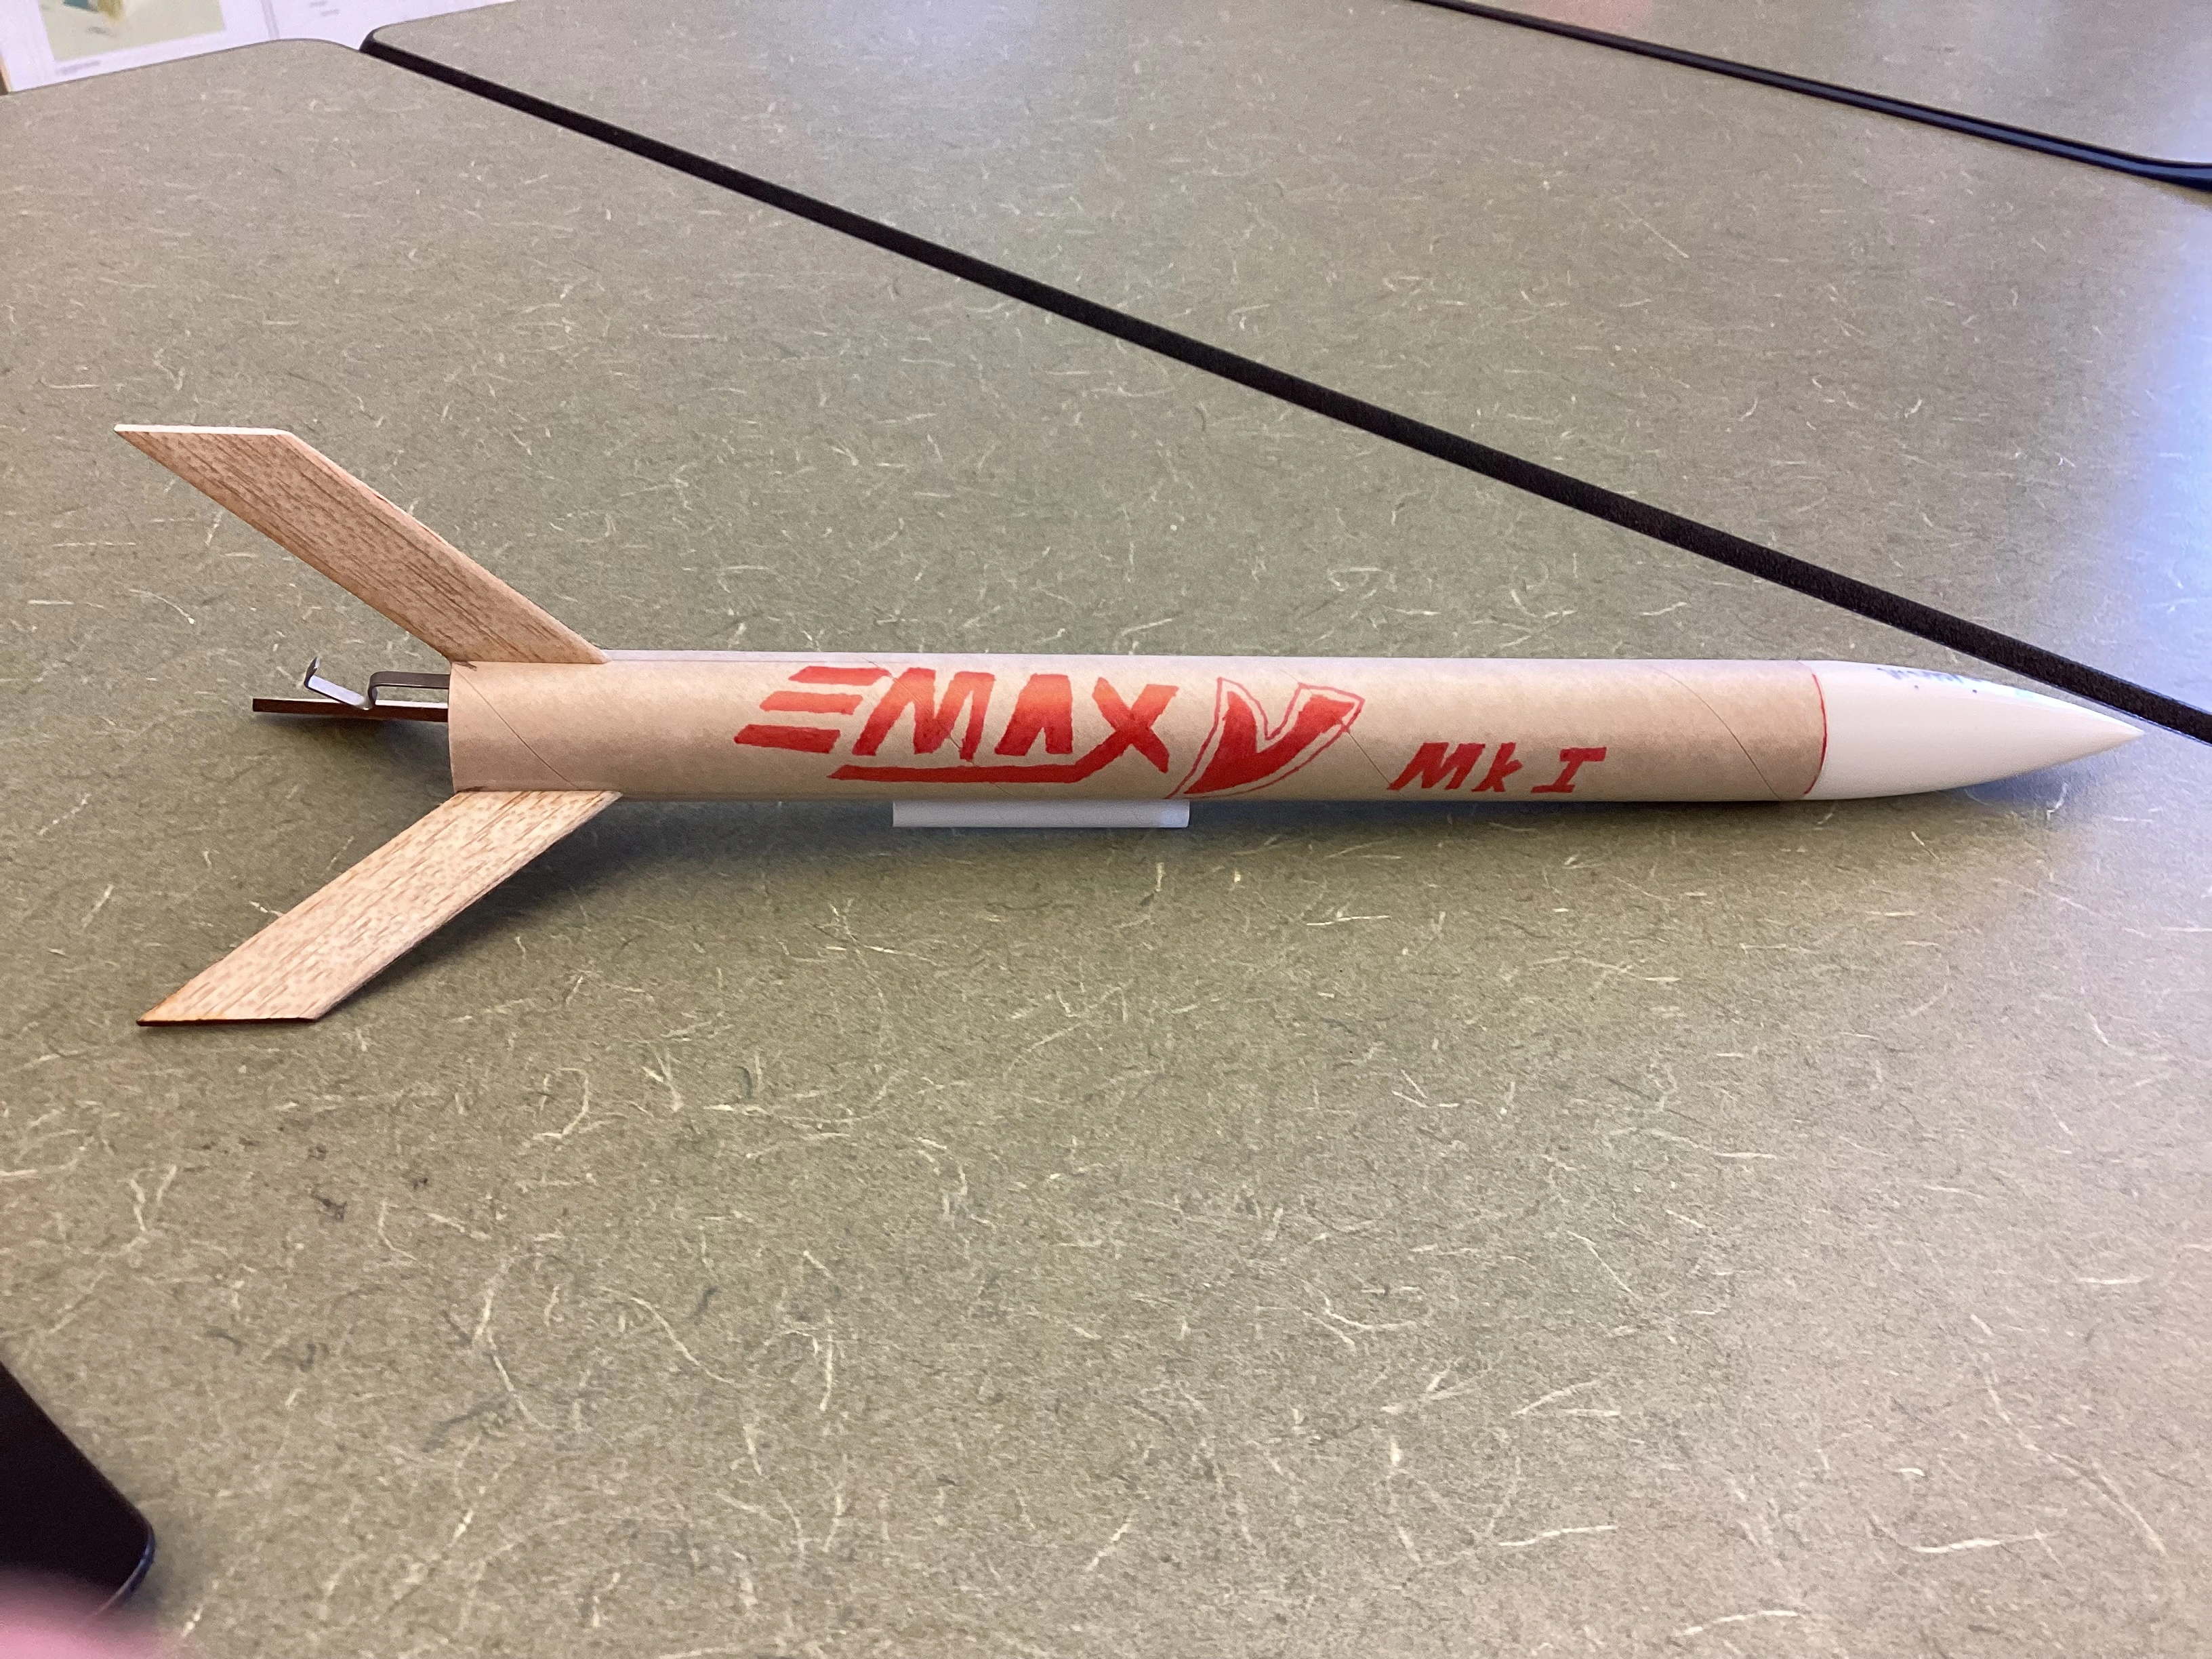
Building the Rocket
Steps in the building process:
* To start the building process, I created the engine mount using a cardboard engine tube and cardboard centering rings superglued around it. The engine mount also includes a metal engine hook so the engine stays in place during descent.
* The cardboard body tube had to be shortened to nine inches in length. To do this, I used a circular marking guide to mark a circle around the body at the nine inch mark. Then, I used an X-Acto knife to carefully cut the body at the marking. After that, I was able to use tacky hobby glue to set the engine mount inside the bottom of the tube.
* To ensure the accuracy of my fins, I used a lasercutter. It was very important to align the leading edge of each fin with the grain of the 3/32 inch balsa wood. Once lasercut, I sanded the leading edge of each fin, taking care to ensure a drag-reducing design would be made. Then I attached the fins to the fuselage at marked locations marked using a marking guide with three equidistant points as the fin locations. As always with using cyanoacrylates, I used very small droplets between the materials to set them in place, and followed up with applying some super glue along the edges of the joint.
* As the rocket also needed a recovery system to ensure multiple flight tests could be conducted, I used paper and super glue to glue a piece of paper to the shock cord. This was then attached to the inside of the body, leaving room for the nose cone to be inserted into the body. The other end of the shock cord was tied to the nose cone, and the parachute was tied to the center of the shock chord with a drop of super glue to keep it from slipping or unravelling.
* For guiding the rocket off of the launch rod, I glued a launch lug (straw segment) to the body a bit less than half way up the body, taking care to ensure it was parallel with the body and had no fins blocking the launch rod.
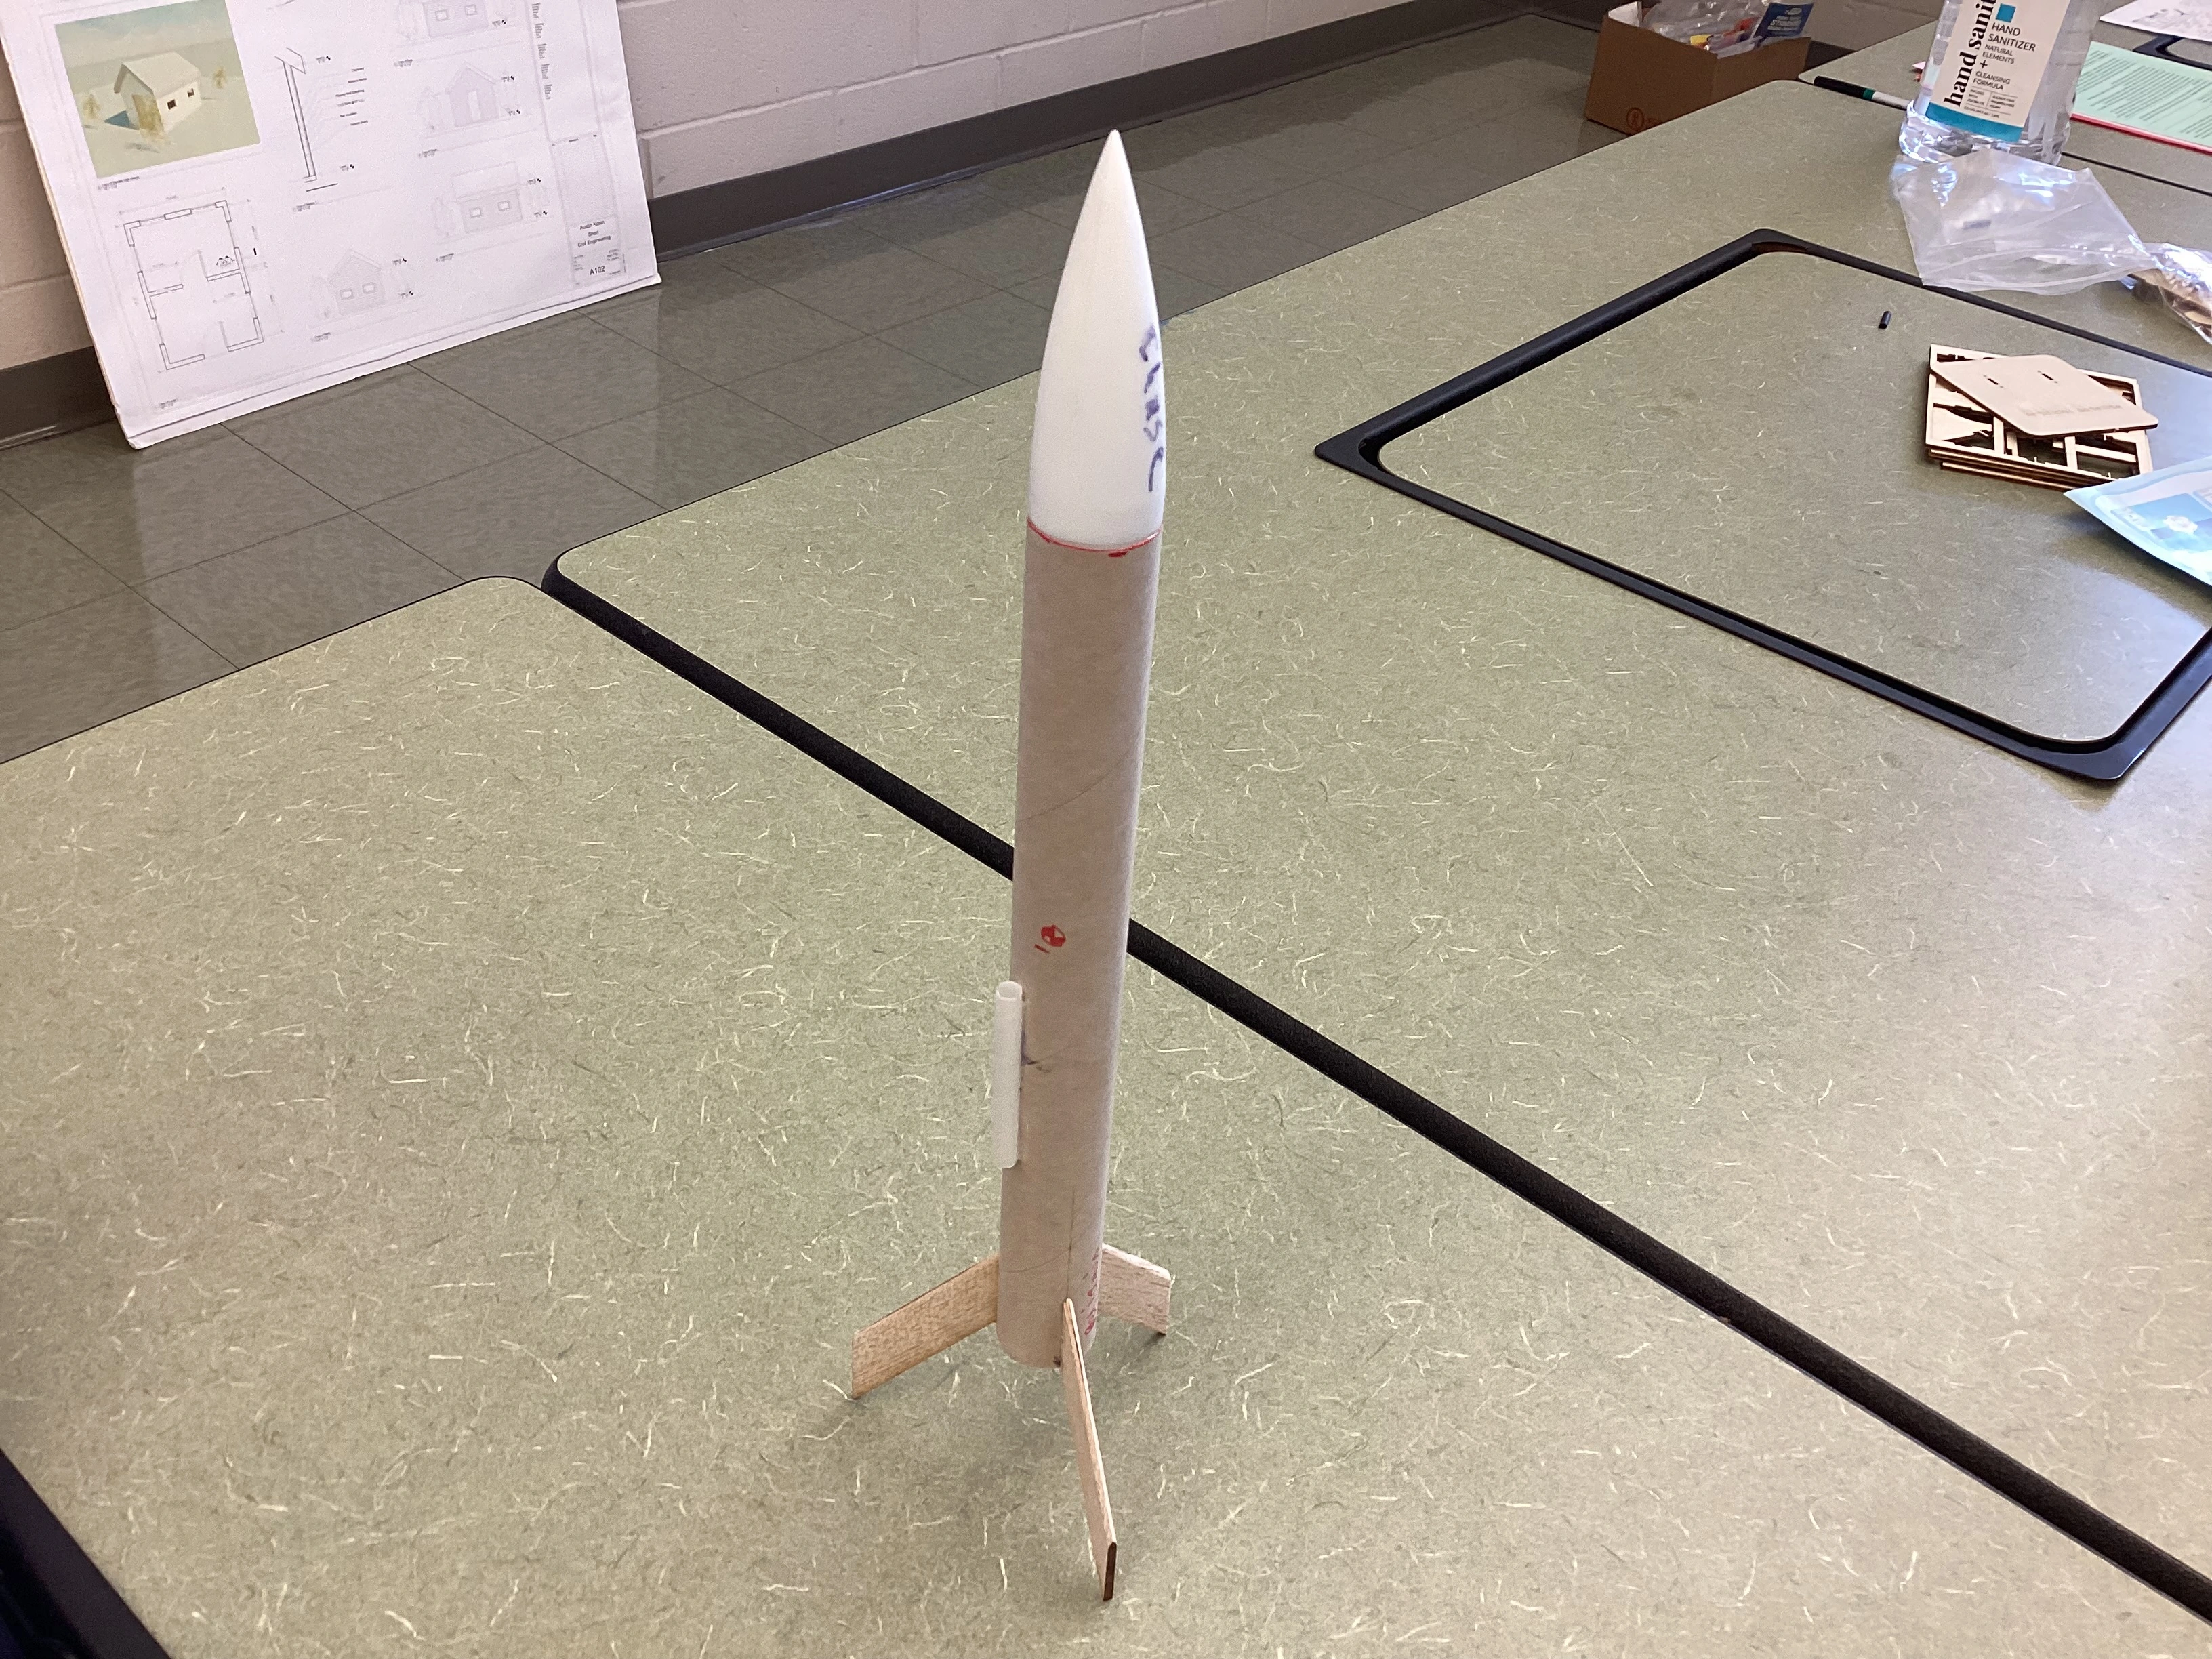
Finished Model Rocket and Components

Stability Testing
To test the stability of the rocket and find the optimal center of pressure, I used the lassoing technique. This involves finding the center of gravity, fascening a string to the body at the center of gravity, and swinging the rocket above one's head in a circular motion. If the rocket maintains a level position, it is considered stable. If not, adjustments are made until the optimal attachment point for the string is found.
Rocket Launch
I have not had a chance to launch the model rocket yet due to time constraints and weather conditions.
Conclusion
The goal of this project was to design and build a model rocket that could achieve a very high apogee, or maximum height. As a result of this requirement, the rocket needed to be both aerodynamic and stable. I chose a small, pointed nose cone and short body since decreased surface area also decreases drag. This allows the rocket to fly faster with the same amount of thrust, thus increasing the apogee. In addition, the fins needed to be small to reduce drag, but to an extent as a lack of fin surface area would cause instability. To allow for multiple tests, the fins also needed to withstand multiple landings.
In the design phase, I had to overcome multiple challenges. The fins needed to have optimal dimensions. Along with this aspect of the design, the body could have a minimum length of 7 inches. While having a low body length decreases drag which causes an increase in the apogee, a body lenth too small can result in the parachute burning from the heat of the engine. If the parachute is too close to the engine, not as much wadding paper can be inserted, and the parachute can burn. To balance the criteria of having a high apogee and ensuring the safety of the recovery system, I chose to create a 9 inch long body.